Showing posts with label Crafts. Show all posts

Tuesday, December 18, 2012

JOY...Part 2


To make 3 "JOY" yard signs we used 2 sheets of plywood 3/4" thick.  
Here is the "back" part of the "O"
Trust me it will look better when it is all put together.....I sure hope so.
 Here is the "O", it has the manger cut out in it.
Randy is drilling for the posts to go in.
Put it all together and this is the "O" part of the JOY.
It makes it a 3D Nativity.
 Next Randy drilled holes in blocks of wood and screwed them into the letters.
We will put metal stakes thru the back side and so they won't blow over in our Oklahoma winds.
 I primed all of them.....Pink primer isn't exactly pretty for Christmas,
but a necessary step....so I am told.
Then the red and white paint.
A small assembly line here, 2 coats of each color 
and I used outdoor paint for this.
I will show you the finished product next time....I hope,
I am having trouble loading my photos....wish me luck.

Merry CHRISTmas to all.

Thanks for visiting my "Joyful" part of the country,
Jana

Wednesday, December 12, 2012

JOY..A Yard Ornament...(Part 1)


About 3 years ago I saw a yard sign that I fell in love with.
I have wanted it ever since and found out my daughter-in-law and daughter wanted one as well......so

 I went on internet and found the pattern for it and was off on a mission to make 3 sets.
Sara (daughter-in-law) was in charge of tracing the patterns off for the guys to cut.
She might have had a little too much help....Jag was helping hold the pattern down.
 After the pattern was traced it was then moved to the "cutting" department.
This was my son and husbands department and I must say they did a great job.
I'm not sure they would wanted this as much as the girls did, but they were good sports about helping us with them.

More on this project coming soon to a blog near you,

Thanks for visiting my Joyful part of the country,
Jana

Monday, November 26, 2012

Christmas Stockings


 I have always been told that I see things different than most people....good or bad.
When I saw this house falling down I first thought it looked like a great photo and then....
I saw Christmas stockings.
I got my husband to go out and get some boards from the house.

 Then I got a pattern from the internet and he cut me out some stockings.
 I had some ribbon and first made some bows out of, and tied with wire.
 Then took some greenery with pinecone (this is actually one bunch that I took apart).
 Rustic...it works with us.  A Rusty snowflake and bell.
 Tied them all together, the bow, greenery, snowflake and bell.
Then just stapled them onto the stocking.
I'm going to hang them outside for Christmas.
They are rustic and fit our house perfect for the holidays.

Thanks for visiting our part of the country,
Jana

Wednesday, October 31, 2012

My Pumpkin Patch


I haven't carved pumpkins in a few years, but still love my pumpkins, I just paint them instead.
Many years ago I painted this set of pumpkins, brick fences and blackbirds
Let me introduce them...well the pumpkins at least.  
 This one is a girl with her umbrella and fan.
This is the smart one of the group.
 My farmer with his pitchfork....not too happy, it must have been a bad year farmin'.
My baseball player with his bat.
 There is always one joker in the group.  Don't ya love those curls? 
 This one loves to eat....not pumpkin but popcorn.
The school boy with his backpack.
and what pumpkin patch would be complete without a cowboy and his rope,
and of course a mustache.

Happy Halloween!!

Thanks for visiting my part of the country, 
Jana


Monday, October 22, 2012

I'm a copy cat...

 I love pinterest.  I might  am be addicted to it. 
 How simple is this?  
If only I could think of this on my own....

Simple and yet I love it. 

Thanks for visiting my part of the country,
Jana

Friday, October 12, 2012

Fall Paper Crafts..


Fall is....candy, trick-or-treat, pilgrims and turkey.
  I made these pumpkins last year for fall.  
Different size circles or ovals glued together and then I used paper bag and glue for the stem.

I made the pumpkin pie as well.  All out of paper, some bows and just stamped the sentiment on the end of the crusts.

Thanks for visiting my part of the country,
Jana


Friday, October 5, 2012

Fall decorations...

 I love to decorate for holidays....I always have.
 This is Frankie...I painted him and all his friends.
Isn't he a cutie?
 My "mummy".  I also painted him once upon a time.
 This is a scarecrow I have had for years, no I didn't make him.....
it requires sewing and I don't sew........if a glue stick won't fix it....forget it.
 My squirrels robbing the basket full of food.
 I have a lot of mums...this isn't even all of them.
 I don't normally like witches, but I like this one, 
maybe it's the green eyeshadow I gave her.
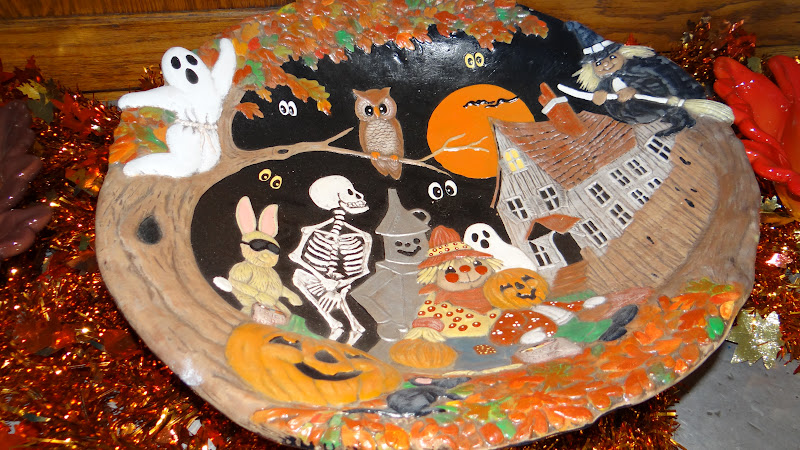
My halloween bowl, this took me forever to paint...I was so glad when I finished this.
 I painted this pumpkin that has a spider on his head....and 8 tiny tennis shoes..
but my favorite fall decorations just might be.....
 the pumpkins my kids painted.  This one was by Kayla.
Such talent, I know.
This one is by Kyler, I taught him everything he knows about painting.
A face only a Mom could love.

These get more precious with every year.

Thanks for visiting my scary part of the country,
Jana

Saturday, September 22, 2012

DIY Ribbon/Material Fall Wreath

I thought I had better get this posted for the first official day of fall.

I started out with this wire wreath from Hobby Lobby, and I'm sure you can find these at your local craft store.  Then bought about 8 different materials in fall colors, patterns and even different textures along with  about 15 different ribbons in a variety of widths and patterns as well.  I tried to get some solids, some with patterns, different widths and textures for a variety.  Although I had a wide variety of textures, widths and patterns I tried to keep most colors in brown, orange and golden tones to go with the fall colors.  
 Then start cutting, I used pinking sheers both my ribbon and material. 
 I cut the material into strips about 8-10" long and about 1-2" wide.

I then cut the ribbon about the same length and then laid all of my strips out in an assembly line.
I know it looks like a lot and it is, you can use more variety if you wish or less, there is no right or wrong when it comes to this part.  Also if you don't want yours as bushy as mine turned out, just make your strips shorter.
 I started on the inside ring and just tied on each strip, going down my assembly line.  You can tie a single or double knot, I did a double because I didn't want to have mine have any chance of coming apart later.
At first it didn't look very full, but give it time.  It also makes a difference how close together you put all the strips.  I liked mine pretty full, but I will warn you it can take quite a while to tie this many and it can get a little costly for a wreath, or at least I thought it was.
I only tied mine on 3 of the 4 rings.  
I used the inside 2 and the outside ring, for me it was full enough.  
When I finished I gave it a haircut to even out some of the longer strips.  
 I am going to add a brown ribbon to hang it by, but it is not necessary, 
it will hang on the wire ring without it.
This really wasn't hard at all to make, just a little time consuming, but not bad.  
If you like crafts as much as I do, you'll find it worth your time, and I hope this helps.

Thanks for visiting my ragged part of the country,
Jana