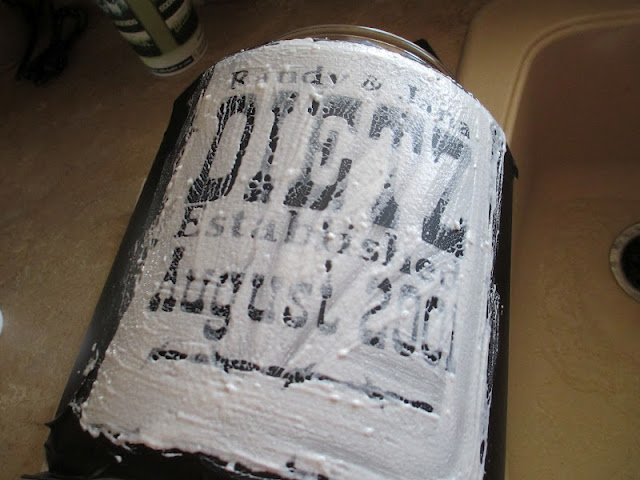
First I bought a plain glass cookie jar from a discount store, but you can use any glass that you might already have. I have done glass etching before and this is what I wanted to etch onto my cookie jar this time. I first made the design that I wanted on my "Cricut". In case your not familiar with a cricut, it is not a pesky bug, but a cutting machine. On the matt I laid down my vinyl to be cut out. This time I wanted the letters left clear and around them etched or frosted.
The black is the vinyl cut into my stencil. I also cut another stencil for the outside boarder to look like a "wanted" sign.
To get my letters onto the glass I used "transfer tape" and rubbed it over the letters to pick them up and then put them onto the jar where I wanted them, making sure it was level and centered top to bottom. Make sure that all the edges of the vinyl are down really, really good because anywhere the etching cream gets on will get etched....trust me I know this from experience. To help I make the vinyl a little larger around the edge so that I have extra room in case the cream goes over.
This is what I used for etching. I bought it at our local Hobby Lobby Store...
AKA my home away from home (Love that store, I should have stock in it.) It is not cheap, for the larger bottle it is around $18-$20, (use a coupon).
Next take a disposable brush and apply the cream all over the glass that is to be etched, being careful not to get it where you don't want it. I put mine on thick and leave it on longer than the instructions say to. It says 5 minutes, but I leave mine on 15-20 minutes.
Next I clean off the excess and because I'm a tight, I put it back in the bottle and re-use it.
Then just rinse off the excess. Be very careful with this stuff, remember it "eats" off glass. Now the fun part, taking off the vinyl and seeing what it looks like.
Sorry, your going to have to wait until my next post and I will show you this project and several other ideas on how to use this.
Thanks for visiting my frosted part of the world,
Jana


what an interesting process! have not seen this done!
ReplyDeleteI hadn't either, the first time I wasn't sure what to expect.
DeleteJana!!! I was really into this, and scrolling and reading so as to get to the "after" photo, so, pleeeease hurry up AND what is going IN the jar?? A particular purpose. Oooooh, curiosity killed the cat but I'm hopin' it won't kill me!
ReplyDeleteI can't give away too much at one time....got to keep my readers wanting more LOL That only shows how I need to get a life , and some kind of chocolate will be in the jar I'm sure.
DeleteOh you are such a tease!! I too was scrolling and reading in anticipation of the 'after' picture.
ReplyDeleteit's my "cliffhanger" LOL, that shows how I need to get a life.
DeleteWow - that was pretty interesting! Can't wait to see it.
ReplyDeleteI love this and of course I'll know what to expect for my birthday!!
ReplyDeleteMy kids just got a dog...how fun to etch a treat container with his name!
ReplyDeleteThat would be cute...the ideas are endless and nice to personalize
Delete